We all love Target*.
I am not sure that is something that does not have to be said, but I said it anyway. 😉
One of The Hubby’s and my favorite activities at Target is to go “clearance shopping”. This activity entails us walking through the store looking for the big, red “Clearance” signs. Most of the time you will find us walking down aisles just to get to all the back end-caps, where most clearance is normally placed. The Hubby and I love a good deal, or at least feeling like we got a good deal. I would say this has lead to the purchase of things we don’t need, but many that have turned out great!
I found two wooden baskets on clearance recently during one of those type shopping trips with The Hubby. And they were a GREAT purchase.

They looked super cute in the store, but when I brought them home, I really didn’t know what I was going to do with them. They seemed just a little to “flimsy” to with stand putting blankets in them, like I had originally envisioned in them. So with lack of an idea of where to put them, they just sat in my living room behind our couch for over a month.
One day when my Father-in-Law was visiting, he goes to me, are you going to hang those like lights? And I said, “I wasn’t planning to. I actually might return them because they are too flimsy.” He said well you could put a hole in the bottom and use them as lamp shades. And he picked one up, flipped it over and held it up in the air.
This was one of those moments where you say to yourself, “Why did I not think of that?” I was too clouded by my disappointment that these baskets would not hold my blankets that I did not see a creative way to use them.

After we decided these should be lamp shades, I immediately ordered two single light sockets with cords. While I waited for the sockets to come in the mail, I scoped out where I wanted these to hang. Lets be honest, we all know this was only 2-days because Amazon Prime is the best thing in life.
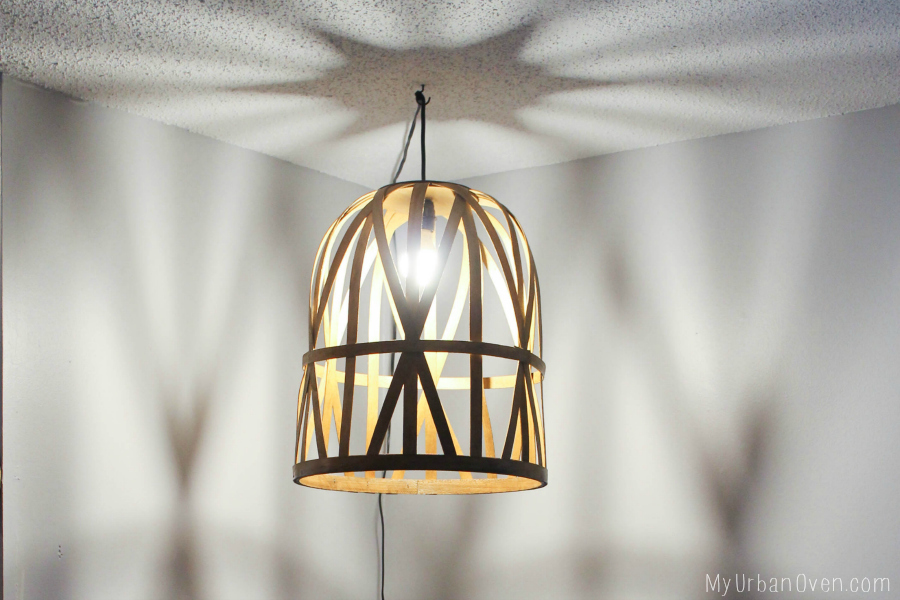
We have a corner in our Living Room that I had an inexpensive floor lamp, and I thought this would be a great replacement for that space. I am still thinking about where the second one will go, I think it will be going in our Sunroom, but that is still TBD.
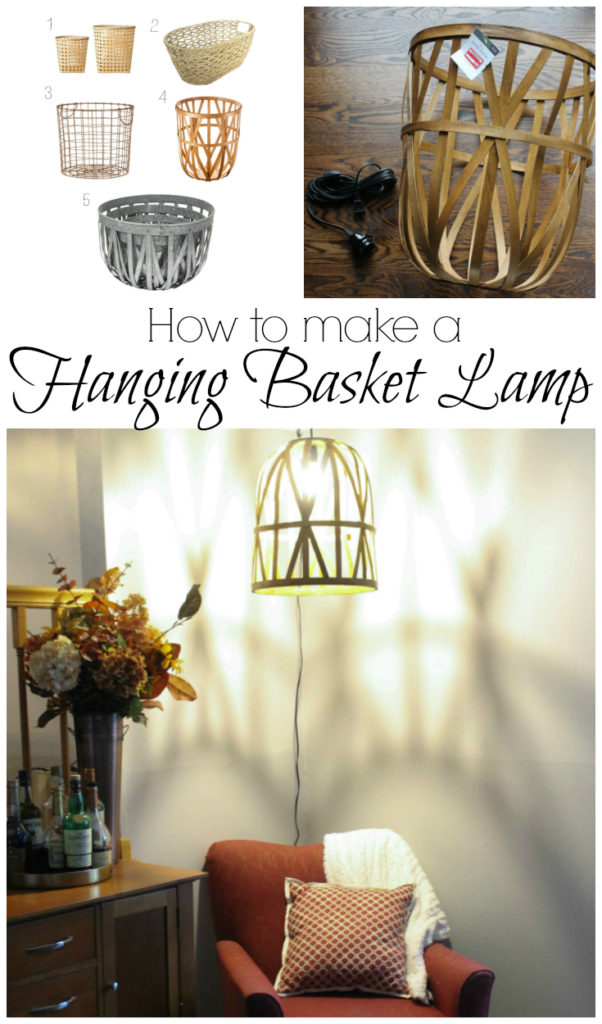
“Making” the lamp was pretty easy over all. It maybe took me 5 minutes to locate my tools and complete the project. The only real work you need to do is creating a hole in the bottom of your basket. My basket was wood, so I used a 1/2″ drill bit on my drill and made a hole in the center. I had to slight enlarge the hole to make sure my plug end fit through the hole, but that was easy to do by moving the drill around the hole more. I had originally bought the light socket that could fit a lamp shade, so it has a coupler on the end. In the end, I decided I liked the look of the light when more of the light socket was exposed inside the basket, so I only needed to fit my plug end through my hole. I you would like the basket to be more of a shade, you will need to cut a bigger hole, but you will need to ensure you have the right size drill bit to do that. You could use one of these to make a bigger hole.
As for actually hanging the lamp, I had a few ceiling hooks at home from another project, so we screwed them into the ceiling. I chose to go with black hooks because they matched the light fixture. The matching hooks look like they came with the light, not something we added afterwards. After The Hubby screwed the hooks into the ceiling, we wrapped the cord around each hook and plugged the lamp in.

From start to finish I think this project took us no more than 30 minutes to complete. I loved that even though this project was quick, I felt accomplish. Checking something off my project list, always feels really good.
I personally love how this lamp looks in our corner now. It adds a nice design feature and gives off a ton of light. I also have the light connected to our Echo, through the Philips Hue Light Bulbs.
I feel like a kid with a toy having the Echo. I can tell her to turn the lights on and off as many times as I want, and for whatever room I want. You can only imagine what I look like sitting on my couch asking Echo to turn lights on and off.

1/2/3/4/5
I pulled together a few options on baskets I thought you might be fun make a lamp. As I mentioned, I bought my basket on clearance, so how do you get your hands of the same basket? I am not sure you will be able to find it in stores, but it still is available online, last time I checked. The other 4 options could look really great as lamps too. I really love #3, it really does look farm house, and could look great in a kitchen. It does look to have a hole in the bottom already even. I also think #2 could be fun to make with 2 lights and hang over a table. The options really are endless. You just need to find the right basket that would allow for light to filter through.
Now that this light has been up for a few weeks, I am itching to hang the second one. Maybe a project for this weekend.
If you have any questions about doing this project at home, or something similar, leave a comment below or shoot me and email, Rachel@myurbanoven.com. I would LOVE to help answer any questions or even help pick a basket and pick a place in your house to hang it.
Don’t forget to follow My Urban Oven on Facebook, Instagram, Pinterest and now YOUTUBE for more inspiration, my continued ramblings, and photos/videos of what is happening in the My Urban Oven Kitchen!
XOXO,
Rachel
P.S. Instagram Stories are my jam these days… so don’t forget to follow & tag me if you are making one of my recipes!!
*Disclaimer: If you do not know, I work for Target HQ in Minneapolis. I do not represent Target in my views nor do they sponsor any of my content. They just pay my big girl job pay check 😉
*This post contains affiliate links*

