Lets jump back to Our First House again and talk about the Main Bathroom. I shared one update right after we moved in of us changing out the lighting, but never did a full reveal for you.
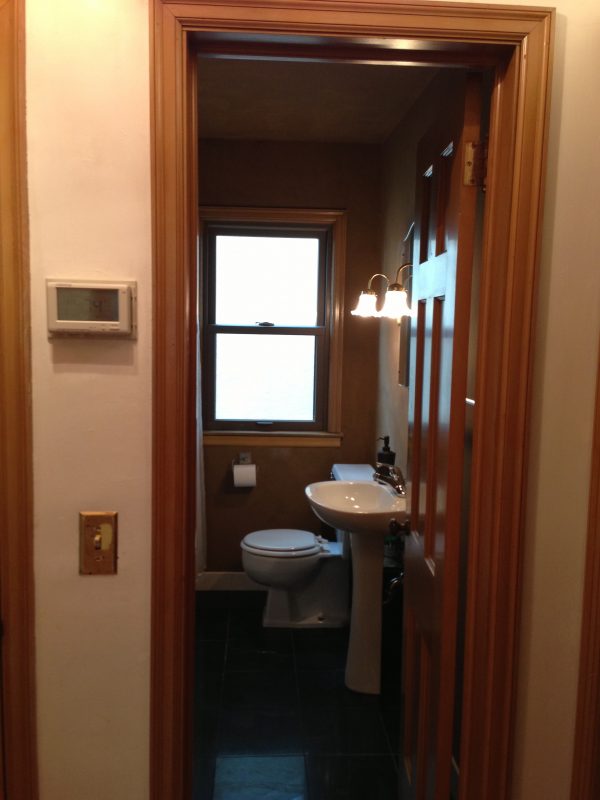
As a reminder, this is what the Bathroom in our First House looked like when we moved in. The bathroom was the worst room in the house. The walls were painted a chocolate brown with a sponge treatment and not only where the walls painted that color, the CEILING was also painted brown. I had never seen a bathroom with the ceiling painted, let alone painted brown! Normally when I describe this bathroom, I tell people “the walls were painted poop brown, not the most ideal for a bathroom”… if you get my drift. Maybe TMI, but you needed to understand how awful this was.
The paint wasn’t the only think that needed changing. The window faced our neighbors side entry door, and didn’t have any type if window covering. The mirror was old and chipped. Oh and those lights, the not only were super far down on the wall, but they faced down, with no white ceiling to bounce off, leaving the space super dark and uninviting.
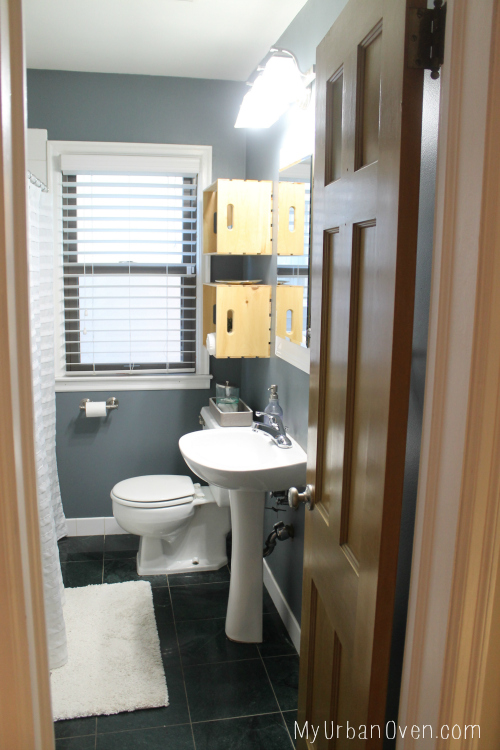
Let’s get to the better photos, the after. In the end we made changes to the lighting, mirror, wall color, trim color, decor and accessories. Even though we made this change to the house within the first 3 months of living in there, I never shared an update. Oops. Sorry for making you wait so long.
As I have told you in the past, paint can make a HUGE difference in a space. This bathroom was no exception. Look at that pretty white ceiling with all the pretty light bouncing off it filling the room. I would not say there was much difference between the quality of natural light between the before picture and this one. It truly was all the changes we made, the ceiling being one of the biggest impacts.
I did share with you earlier how we changed the lighting in this space from next to the mirror to above the mirror. The transformation was second to paint for impact to the space. More bulbs and higher placement gave a ton more light in the space, something much needed for the shower. The old lighting made it almost impossible to see while showering.
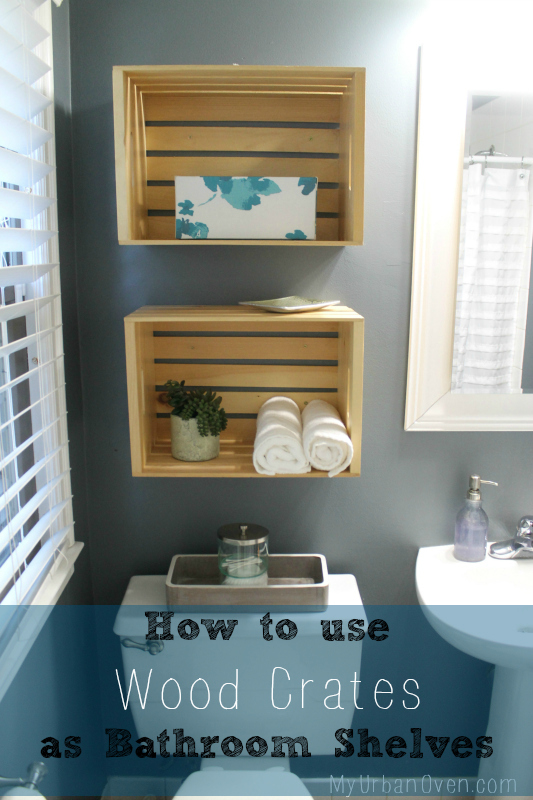
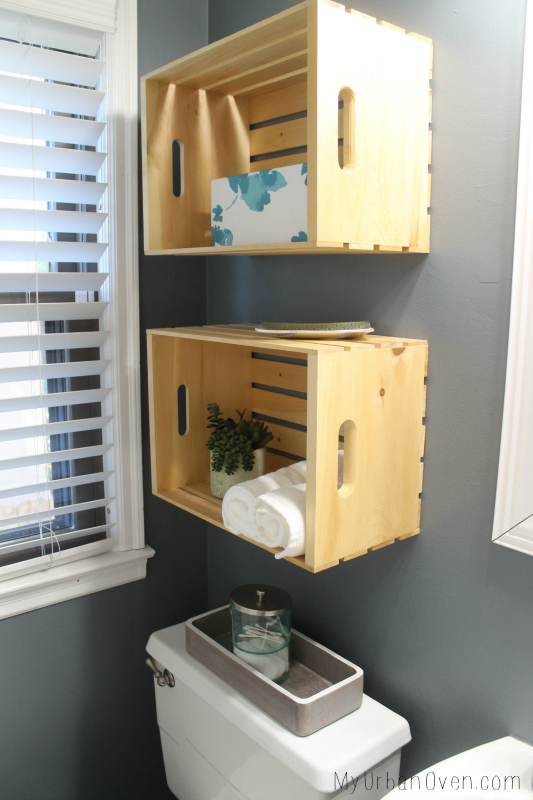
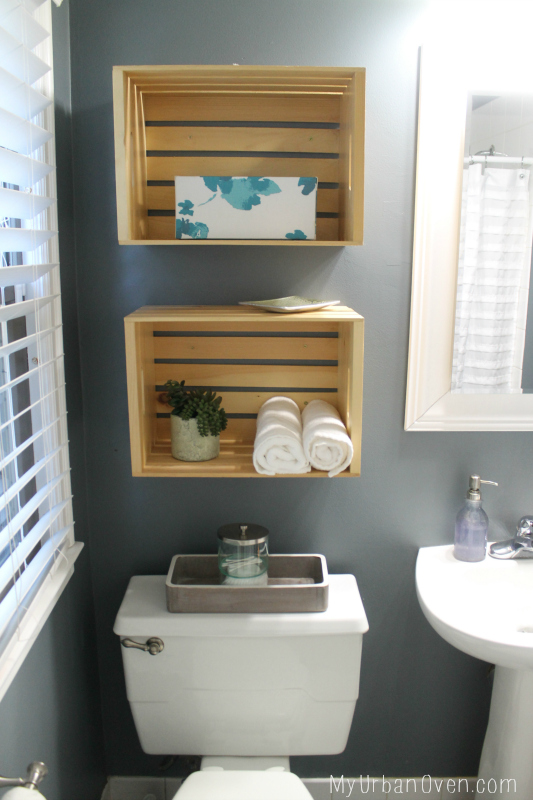
The bathroom also lacked storage, with the linen closet in the hall. I wanted shelving above the toilet, but I really do not care for above the toilet shelving units that sit on the floor. I got the idea to hang these crates on the wall from a pin that had wicker ones hanging above the toilet. The wooden crates were fairly inexpensive to buy, and with a quick coat of polyurethane, they stood up to the moisture level in our bathroom. These crates are only $12 at Home Depot, and I already had polyurethane, so these shelves only cost me $24, which is much cheaper than any bathroom shelving I could buy. These crates would be even better, if I were to repeat this idea in another bathroom, they have a divider in them that would make even better shelving! You could even stain these crates to match the decor of your space, I personally liked the color for my space, to add a natural, raw look to the room, but a stain or paint would be great too.
Attaching to the wall was pretty easy too. I just screwed right through the back of the crate into basic wall anchors. I put two in one of the top slots, and two in the bottom. Adding 4 screws total made sure these would not move around, and that they could hold a little bit of weight.
I never took a super great picture of the mirror, but you can see it in the side of the below photo. We decided that since there was no storage in our bathroom, when we replaced the mirror it needed to be a medicine cabinet again {that is what was already there}. The issue with that is medicine cabinets don’t always look all that great, and if you want a fancy looking one, you pay a ton for it. After taking a few trips to the store, we decided to replace the mirror with a super basic medicine cabinet, but then add crown molding around the outside to give it size and interest.
I love how the mirror turned out because it not only was functional, but was a fraction of the price it would have been to have a similar looking medicine cabinet. The additional trim around the mirror not only made it look much bigger but it also added more white trim for light to bounce off, adding brightness to the space.
As for accessories, I used a white rug by the shower to lighten up the dark green marble floor. In the beginning, I wanted to change the floor too, but after all the other updates, I changed my mind. The dark floor seemed to be less of a issue once it was clean, and the rest of the room was much brighter.
I also kept with the white theme for the shower curtain, window blinds and trim. Adding all the white to the space gave the illusion that the space was bigger and brighter. White really is your friend in a small space.
And there you have it, the final reveal of the bathroom update we made in our First House. If you want to see more before and after photos of Our First House, you can check them out on Our House Project Page.
Stay tuned for more reveals of the updates we made to Our First House! And what we are doing at Our Second House!
Don’t forget to follow My Urban Oven on Facebook, Instagram, and Pinterest, for more inspiration, my continued ramblings, and photos of what is happening in the My Urban Oven House!
XOXO,
Rachel
P.S. I am falling for Instagram Stories… so don’t forget to follow & tag me if you are making one of my recipes!! * you might even get to see a glimpse of garden projects this weekend😉
This post contains affiliate links. I only share products I know, have used, or love myself.
Comments
10 responses to “Our First House Bathroom Makeover”
I love the color of the walls! Using crates for storage is perfect. I may have to do that for our guest bathroom. There is zero storage in there now…..
I would highly recommend crates! Storage is so hard for bathrooms, but I love the look of the crates 🙂
WOW. That paint really did make an insane difference! We have the most stubborn wallpaper up and my husband and I are both dreading doing it so right now our bathrooms are both in this gross in between stage. I can’t wait to renovate ours! This looks amazing!
Paint seriously makes all the difference… Getting the wall paper down is a tough job, but once you do it you will be so so very happy you did!! good luck!
i LOVE it! the pant made such a great difference! And I LOVE the boxes above the toilet, SO cute.
I love the crates on the wall! I wouldn’t have thought to do thay!
it looks beautiful! I love what you did above the toilet. Walking into a beautiful bathroom at someone’s house honestly is such a great feeling!
I love how it turned out! I actually just re-did our master bathroom (just paint and wall decor), and you are definitely right – paint makes a huge difference!
I love the floor color! Also what a genius idea with the crates. I need somewhere to store my towels closer to the actual shower so I may do this too!
Omggg this makeover is beyond amazing and super inspiring! I especially love the next paint color. well done!